Showing posts with label Desserts. Show all posts

Tuesday, December 11, 2012

Fresh Eggnog, very easy and oh so good


As we sat down for Advent, the snow was falling peacefully outside. We warmed ourselves by the fire and the kids gleefully sipped on small wine glasses filled with eggnog. They feel so grown up enjoying their special holiday drink.

For me it's not quite the Christmas season unless a glass of eggnog is being sipped on during the joyful time of decorating the Christmas tree, playing games together as a family near the fire and taking a quiet moment to celebrate Advent. While store bought eggnog may have a place, making fresh eggnog isn't hard and all the more enjoyed when the eggs come from your chickens and the cream and milk being used is from a wonderful raw milk source. You could almost call the drink healthy... almost. :)

This particular eggnog is creamy, yet light from the addition of the whipped egg whites. It's also not overly sweet, it more falls into the just right category for me. Some may prefer a bit more sweetness if more accustomed to store bought eggnog. If so, you can increase the sugar to a more desired amount. While it can stay in your fridge for several days, it's best enjoyed right after making it. It only takes about 15 minutes to make. 

Tuesday, March 13, 2012

Coconut flour yellow cake - great for birthday cakes! Gluten and grain free.

My husband's birthday was several weeks ago and one dessert item he's had a hankering for is good old fashion yellow birthday cake. The only problem is our son can't have wheat, so that nixes the majority of recipes out there. I know that I could have used a gluten-free flour to make a close substitute, but to be honest I'm not a huge fan of the GF flours on the market. They are often filled with ingredients that I'd prefer to avoid in our diet. So, instead I made a very delicious version using coconut flour.

I've messed with this recipe over the last year on and off again, playing around with different ingredients. This time because I wanted to provide something more similar to a traditional birthday cake I went with more traditional ingredients, like organic white sugar instead of honey and butter instead of coconut oil. I have shared a coconut flour chocolate cake recipe we use all the time. You can get away with a different variety of ingredients with chocolate cake, because the chocolate masks some of the flavors, but with a white cake a flavor like honey or coconut oil will be much more pronounced.


Wednesday, December 21, 2011

Real Food Christmas Basket: Chocolate Almond Butter Popcorn w/ Coconut Flakes (soy free) & How to Make an Origami Box to Put it in for a Gift


I originally found the idea for this recipe on Browned Eyed Baker last winter. The first time I made it I did it just as the original recipe called and it was great, it's essentially puppy chow with popcorn. However, in the end I wanted to make my version a little more real food friendly. This turned out easier to do than I thought and what's great is you don't need pre-made chocolate, which almost always has soy lecithin in it, an ingredient that's best to be avoided if possible.

This isn't overly sweet, but instead just sweet enough and perfect for satisfying a desire for a desert or a fun snack. The kiddos love it too! My son told me today as he was eating a handful of the popcorn, "Mom, this is delicious!"  That's what this momma likes to hear in the kitchen! Of course, can you really go too wrong with chocolate, almond and coconut with a bit of crunch? Umm, I think not. :-)


 Chocolate Almond Butter Popcorn w/ Coconut Flakes

What You'll Need
~ 10 cups 

1/2 cup organic, unsalted butter
7 tbsp. rapadura or other sugar
2 tbsp. organic, whole milk
5 tbsp. organic cocoa powder
2 tsp. pure vanilla extract
1/2 cup organic almond butter
8 cups plain, organic popcorn
2 cups non-sweetened coconut flakes

Wednesday, December 14, 2011

Real Food Christmas Basket: Sourdough fruitcake and I promise this tastes superb, only real ingredients here!


I think I fall into the category of many who shutter when they hear the word fruitcake. The stomach gets a strange feeling when someone offers a piece of this so called Christmas treat that has been wrapped in plastic and a cardboard box, has the most unnatural colors in it and has been sitting on a shelf at some store or warehouse for who knows how long.

As much as I detested fruitcake I have one family member, aka my dad, who loves it and several years ago asked for some for Christmas. There was simply no way I was going to buy one of those bricks of "cake" they sell at a stand in the mall, so I set out to find a version I could bake at home. As first glimpse of looking through recipes I was fairly disappointed to see that most people stuck with the fake candied fruit which almost glows with the food coloring that must be added to it. These recipes also called for many ingredients I don't use, won't use and frankly can't even buy at the co-op where I do almost all my shopping. However, I was determined and so kept searching. That was when I found Alton Brown's recipe for his "Free Range Fruitcake" on the Food Network. Free Range... sounds interesting... could it be... a real fruitcake recipe... why yes it is. There was no fake fruit, no hydrogenated cooking oil, no questionable ingredients at all actually.


This little jewel of a cake went over wonderfully and I can say that all of us who enjoyed it the first year I made it were fruitcake converts. This year I'm trying to incorporate more sourdough baking in my routine, as well as, whole grains and unprocessed sweeteners into as much of my baked goods as possible. One of the main reason I wanted to try this as a sourdough cake is when you make sourdough at home your starter and flour are mixed together and allowed to ferment for typically at least 8-12 hours. During this time gluten and phytic acid are broken down leaving the baked item far easier to digest and also healthier because by breaking down the phytic acid the body can far more easily absorb the vitamins and minerals in the food.

Friday, November 18, 2011

My favorite apple pie recipe (it has ginger in it!) for Thanksgiving and a Giveaway with a chance to win some Martha Stewart Cookware from Macy's

With Thanksgiving only a week away, we've been busy figuring out our plans to see both my husband and my family. My son is eagerly awaiting the day that we tell him it's time to load up the car and make the drive to grandma's house. He loves his grandparents, cousins, aunt's and uncle's and has been asking me over and over when will Thanksgiving be here so we can see them all.
 
Thanksgiving 2010
While Thanksgiving can be a lot of work with cleaning and preparing food and even stressful as family comes together, I love this holiday. Growing up Thanksgiving was most often intimately spent with my parents and younger brother. My dad traveled a lot while I was growing up, but Thanksgiving day he was always around. My mom was and is a fantastic decorator (and cook of course ;D) and one of the things that brought her great joy and us as well, was to have our home beautiful, clean, with nice music playing and tantalizing aromas drifting from room to room, with an elegant table set with our fine china and crystal. It was always such a treat as a child to see everything so stunning. Things have become a bit more low key as we've all grown older, but the joys of being together and enjoying fabulous food is still wonderful all the same.

To this day, it always brings us, well my younger brother and me, a great deal of pleasure and laughter reminiscing about the not so perfect parts of Thanksgiving. While everything was always beautiful and the food fabulous, there was one little problem that we ran into countless times...

Thanksgiving 2010
Those darn turkeys... no matter how much you try, each year doing your best to perfect your roasting skills, sometimes they just don't want to get done. :-) One year I remember us waiting so long for the turkey to finish roasting, literally that bird had been in the oven all day and just didn't want to get to the right temperature, that by the time is was ready to eat it it must have been close to 10-o-clock at night. My brother and I were so tired we could hardly hold our heads up and in the end couldn't hardly eat a thing. Needless to say, with A TON of leftovers, we had our Thanksgiving meal the next night.  It's happened often enough that the turkey just hasn't wanted to get done, that it always a joke to see what time we'll partake in our delightful, all be it, perhaps late evening meal.

Thanksgiving 2010
I remember on one occasion where the turkey did get done, we had gathered together at my uncle's home. All the aunts, uncles and cousins were together, a rarity that I truly wish could happen more often. My mother was getting the turkey ready and began pulling out the insides before preparing it to be roasted and start to make her fabulous gravy. Instead of the normal neck or gizzard coming out, there was actually a whole turkey head, feathers and all. Talk about startling, disgusting and hilarious all at the same time. Mind you this was a standard store bought turkey, not one from a farm, where you might want to "extra' piece. At that point in our lives the idea of butchering our own animals was far, far from our mind and seeing the turkey head (we'll just hope that the head and body actually belonged together) did a very good job of taking a bit of our appetite away.

Every year we try a new turkey recipe and different techniques, but have yet to find one that I think is so outstanding that I feel I must share it. So for now that will have to wait, however, over the years one thing I have loved to do is bake and learning to bake the ultimate pie has always seemed to go hand in hand with Thanksgiving. I think there is a bit of an art form to pie making and a whole lot of love. It takes practice, but once you figure out a great technique and recipe the end results are so delicious and satisfying that it makes the not so great turnouts worth it.

There are plenty of recipes out there that focus more on the decorative side of pie making with the pretty details you can do or add. While that can be fun, sometimes the flavor is forfeited for the looks. I kind of like the simple, classic looking pie that leaves everyone with a smile on their face after eating one, then two and just perhaps, since it's a holiday, three slices of pie. The classic pie has a homey and inviting feel that lends to that desire to sit down and relax, while sipping on a hot cup of tea and enjoying good conversation and a fun game or two. That, to me, is a wonderful end to a fabulous day.

Friday, February 11, 2011

Ricciarelli or Almond Macaroons - Grain Free


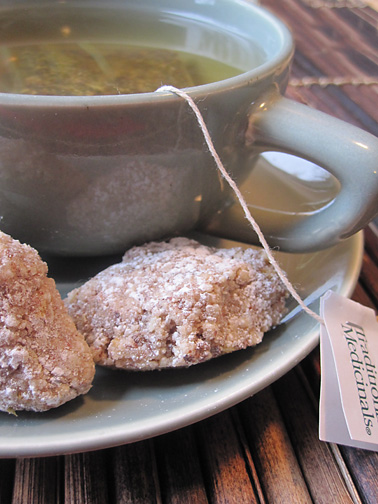
I don't know about you, but I have numerous cookbooks where I tried several recipes from them and either wasn't impressed or completed disappointed. This summer I decided to do away with those less than satisfactory cookbooks and into the trash they went. Now I have my favorites left and at the top of that list is my cookbooks from Nigella Lawson. I've made dozens of her recipes and have had great success with almost all of them. There has been one or two recipes along the way that I didn't love quite as much as others, but that was more personal preference than it was the fault of a poor written or simply bad recipe.  I know I can pick up one of her cookbooks find a recipe that sounds/looks good and it will turn out, which equals a good cookbook to me. Well, these little superb Ricciarelli or Almond Macaroons from Nigella's How To Be a Domestic Goddess, didn't let me down!

Monday, February 7, 2011

Chocolate Coconut Flour Cake Sweetened w/ Honey

I was in a bit of a whimsical mood on this cake making day and Valentines day was on my mind. Out came the heart shaped cookie cutter and I had fun making some bite size pieces of cake.

This is one of those cakes I've been trying to master for a while. Frankly, I've been trying to figure out the best ways to use coconut flour in general. There has been a whole lot of trial and error and a whole lot more failure than successes, but that's how it goes sometimes. I happen to like challenges and I've been determined to come up with a chocolate coconut flour cake that can hold it's own next to one of those typical white flour cakes. Method is key to making this cake as it will make a drastic difference in how light the cake will turn out.


If you've never used coconut flour, I'd highly recommend trying it out. I purchase mine,  from Tropical Traditions. Actually I'm not sure who else even sells it.

When I originally started making this cake I was working with enough ingredients for only one layer. However, in this last attempt I split the batter in half between two pans and was very pleased with how it turned out. I haven't tried to put all the batter in one pan as of yet. It would likely work fine, I just question whether the cake might loose some of it's volume. The cake layers are not overly tall, so if you want a more typical cake with some height I'd recommend doubling this recipe and making 4 layers.

This is a dark and rich cake, but not overly sweet (that tends to be my style for baked goods), if you really prefer a sweet cake you could increase the honey by an additional 1/4 cup. For an icing, forgo the classic butter and powdered sugar frosting for a deliciously thick, homemade vanilla whip cream. It's the perfect companion.  For the pictures in this post, I baked the cake in two 8"x8" square pans. An 8" round would work too, but if you do a 9" round you'll probably want to check the cake after it has baked for about 20 minutes.

Thursday, December 9, 2010

A Rich Pumpkin Custard Cake


There are those times when you want something different, something special, but still yet familiar. That is what this cake is. It's a very rich, flavorful pumpkin dessert, perfect for special occasions. I made it for one of the desserts we enjoyed over Thanksgiving and both pie and cake eaters loved it.
I know the holiday we most often see pumpkin deserts is over with, but this cake is worth it to make for any up coming holidays parties where desserts are a must. 
With the extra moisture the custard provides, this cake can easily be made a day or two ahead of time, but wait until you are ready to serve it before frosting and coating it with the shortbread crumbs. Don't skip the crumbs, they add their own flavor and texture and make this cake just that much more delicious! 

Monday, December 6, 2010

Tate's Bake Shop Cookies & Cookbook Review PLUS My First Giveaway and a great oatmeal scone recipe!


This weekend I had the opportunity to try some of Tate's Bake Shop cookies and what a treat they were! Thin and crunchy with the wonderful flavor of butter, these cookies were great. They aren't filled with preservatives and other questionable ingredients, but instead the ingredient list includes all the items you'd find in your own home kitchen.

Tuesday, October 12, 2010

Apple Spice Cake with Caramel Icing


It's time to share another recipe from my dinner party. This one is a perfect fall desert, with lots of spice and a delicious caramel icing. One of the things I love about this recipe is you can make it a day ahead and it's still wonderfully moist. You could even argue it's better on the second day. I've made this recipe numerous times trying to perfect it and I love how the final has turned out. It's not overly sweet, which is typical of my cakes. Instead the extra sweetness, for the person with a sweet tooth, comes from the caramel you put on top.

Friday, September 3, 2010

Chocolate and Peppermint Cookies

Who doesn't like chocolate and peppermint together. I'm pretty sure the girl scouts would agree with that! After recently enjoying some Back to Nature Fudge Mint Cookies, I began to wonder why I've never tried to make a chocolate and peppermint cookies before. There are certainly tons and tons of chocolate and mint cookie recipes out there, many of them trying to duplicate the famous girl scout version, however most of those recipes included ingredients I avoid in the kitchen. So I set off to make my own version. The first one was okay, I used coconut flour and while the cookie didn't taste bad, I wasn't a fan of the end texture. Too dense. Anyways, I decided to forget the coconut flour and try whole wheat flour. I've actually not been using whole wheat flour in our kitchen for several months now, hence the lack of posts with that ingredient. We took our son off of wheat because he seemed to not tolerate it well, however lately we have allowed him to have some and he isn't reacting the same as he was, so I'm going to start using it more again. Hurray, at least in my book! :-)


Back to the cookies. Round 2, I used honey for the sweetener, whole wheat for the flour and no baking powder or soda. These turned out very good, but I was curious to see what would happen if I used the baking powder and soda. I also tried using rapadura sugar instead of honey, this was primarily because I ran out of honey and wasn't going to be able to get more until this weekend. My son and I set off to make cookies again this morning, using the rapadura sugar, baking soda and powder and these turned out great or as my son said, "Mom these are gooooood." With these cookies I tried chilling the dough and slicing it as well as rolling it in balls and flattening the balls with a glass. Both ways worked, but I think I'd stick to rolling the dough in balls in the future because I didn't have to wait for the dough to chill.

I'm going to include the recipe for the honey version and the rapadura sugar version. The basic difference is the honey version is a bit softer, denser, more cake like, because of the moisture the honey adds and the cookies a tad less sweet. The sugar version makes a crunchier cookie. If you don't use rapadura or are unable to get it, no worries, you can use white sugar instead. Rapadura is a less processed form of the sugar we are used to. It's made from dehydrated cane juice. The molasses has not been removed, so this sugar contains more nutrients, vitamins and minerals then the standard stuff. I'd highly recommend trying rapadura if you haven't before. That's just my two cents! :-)

Okay on to the recipe...
 

Getting Started: Makes approx. 18-24 cookies
For the rapadura version
1 stick of organic butter at room temperature
3/4 cup rapadura sugar or white sugar
1 organic egg
1/2 tsp. pure vanilla extract
1 1/2 tsp. peppermint extract
1 1/4 cup organic whole wheat flour - I used freshly ground white whole wheat
1/2 cup organic cocoa powder
1 tsp. baking powder - aluminum free
1/2 tsp. baking soda
1/2 tsp. sea salt
1 1/2 cups organic, dark chocolate chips

For the honey version

1 stick of organic butter at room temperature

1/3 cup + 1/4 cup raw honey
1 organic egg
1/2 tsp. pure vanilla extract
1 1/2 tsp. peppermint extract

1 3/4 cup organic whole wheat flour - I used freshly ground white whole wheat

1/2 cup + 1 tbsp. organic cocoa powder
1 tsp. baking powder - optional
1/2 tsp. baking soda - optional
1/2 tsp. sea salt
1 1/2 cups organic, dark chocolate chips

Getting Started: Pre-heat oven to 350º
1. In a large bowl cream together the butter and honey, then add, mixing well, your egg, vanilla extract and peppermint extract.

2. In a a smaller bowl, mix the flour, cocoa powder, baking soda, baking powder and salt. Then sift the dry ingredients over the butter mixture.

3. Stir all of the ingredients together until you have a thick cookie dough. Measure out tablespoon amounts of dough and roll into balls. Place balls about 3" apart on a greased or parchment paper lined cookie sheet.

4. Using a glass with a flat bottom, flatten the balls of dough to 1/8" thick. I found this easiest to do by lightly greasing the bottom of the glass, then dipping the glass into cocoa powder and flattening the balls of dough. Ever two cookies or so, dip the glass back into the cocoa powder.

5. Bake in the oven for 10 minutes and then allow cookies to cool on the counter or a cooling rack.

6. While the cookies are cooling, melt your chocolate chips in a double boiler or in a bowl placed over bowling water. Stir continuously until chocolate is melted.

7. Remove chocolate from heat and "ice" the cooled cookies with it. Allow chocolate to cool completely until it hardens again. You can speed up this process by placing the cookies into the freezer for 5-10 minutes.


Sit back and enjoy! For me that means I'm making some homemade peppermint, chocolate chunk ice cream (click HERE for my recipe) this afternoon to go along with my cookies. Oh so very, very good! :-D

Friday, July 16, 2010

A peanut butter ice cream banana split! It's delish


When I started thinking about how I could create something different for a banana split, I began remember my favorite way to eat bananas as a kid, the oh so good and classic peanut butter, honey and banana sandwich. Yummy! I still love these today, so I thought I'd take the same basic idea and apply it to the banana split and guess what.... it works! I can also tell you it's husband approved since there wasn't a drop left on my husbands plate after he got a hold of what you saw in the picture. :-)

Following my rule of thumb to try and make everything from scratch in my kitchen, for this banana split you start by making your own peanut butter and end with making some fresh whip cream.
Check out the recipe and let me know what you think.

Don't get intimidated by making everything from scratch. It's all very easy to make and you can easily do it all, but the the frying of bananas and making the whip cream, a head of time.

What You'll Need - 4 banana splits
For the Peanut Butter
  • 1 cup organic, dry roasted, unsalted peanuts (you could also use raw peanuts)
  • 1-2 tbsp. vegetable oil (consider coconut, safflower or peanut oil)
  • pinch of sea salt


For the Peanut Butter Ice Cream
  • Peanut butter from recipe above
  • 1 cup organic cream
  • 1 cup organic milk - preferably whole milk
  • 1/4 cup raw honey

For the Honey Caramel Sauce

For the Whip Cream
  • 1 cups organic heavy cream
  • 1/4 cup organic sugar - You could probably use honey instead if you wanted to. You'd likely only need about 1/8 cup because of it's more intense sweetness.
  • 1 tsp. pure vanilla extract

And for the Rest
  • 4 bananas sliced length wise
  • 4+ tbsp. organic salted butter
  • A drizzling of honey for the frying pan 
  • Dry roasted peanuts to garnish with


Getting Started
The peanut butter ice cream first: 
1. Start by making your peanut butter. Toss your peanuts into a food processor and process until you have a very thick, slightly chunky peanut butter.


2. Add a pinch of salt and 1 tbsp. of vegetable oil and process until peanut butter is smooth. If it seems a little too thick still, add a small amount of oil (like 1/4 tsp.) until you get to a smooth, creamy consistency.


3. Now you've got peanut butter and you don't have to buy the store bought stuff anymore. :-) Add 1 cup cream, 1 cup milk, 1/4 cup honey to the peanut butter that is still in the food processor. Process for approximately 30 seconds or until all ingredients are thoroughly mixed.

4. Pour mixture into your ice cream maker and follow manufactures instructions for freezing ice cream.

Now for the honey caramel sauce:
1. In a small pot heat over medium high to high heat your 1 cup cream, 1 cup honey and 4 tbsp. butter and 1/2 tsp. of salt. to boiling, stirring constantly.


2. Reduce heat to medium or a bit lower, until mixture doesn't want to boil over and is closer to a hard simmer.

3. Allow to cook like this (no stirring necessary) until your sauce is a light caramel color and it's thickened. From the beginning of heating my ingredients to the end it took me about 20 min. to get it to the right color and thickness.


4. Allow caramel sauce to cool, at least some. You don't want ice cream soup because you poured caramel sauce on it that was too hot! :-) If you make it ahead of time you may have to heat it just slightly to be able to drizzle it over the ice cream.

We can't forget about those bananas: 
1. In a large skillet melt your 4 tbsp. of butter and a drizzling of honey. Place you bananas cut side down and fry over medium to medium high heat for 1-2 minutes or until they are golden brown. Be careful to not have your pan too hot or you'll burn you butter.


2. Flip bananas one time and fry the other side. Carefully remove them from the pan with a spatula and place on serving plates.


And finally the whip cream:
1. Using a hand mixer or an equivalent, beat your 1 cup cream, 1/4 cup sugar and 1 tsp. vanilla extract until you have whip cream. Talk about easy and this whip cream is a million times better then the store bought stuff out of can. (If you have left over whip cream, save it for your morning cup of coffee or serve this desert with coffee and a dollop of whip cream on top. Soooo good!)


Well you're done prepping, now you have the fun job of plating. Just make sure some of the ingredients actually make it to the plate and not to your mouth first! :-D There is a chance that I may be guilty with that...

Enjoy!!!

Wednesday, July 14, 2010

True Peppermint and Chocolate Chunk Ice Cream


When it's stuffy, sticky and hot outside it's time for something smooth, creamy and cold for a little relief and for me that's peppermint ice cream! Since I rarely to never use air conditioning this ice cream has been sounding better and better every day, especially with it's refreshing fresh peppermint. Over the last month or so our freezer has hardly gone a day without this ice cream being in it. As soon as I run out I quickly whip up another batch. 


What You'll Need
  • 2 cups organic milk - I prefer whole milk
  • 2 cups organic cream
  • 1/2 cup raw honey
  • 50 - 60 or about 3/8 oz. washed, fresh peppermint leaves  I used orange peppermint I have growing in some flower pots
  • 1 bar of dark, organic chocolate coarsely chopped into smaller chunks   The darker the chocolate, the better, milk chocolate won't do this ice cream justice. I use chocolate that is 80% cocoa.
  • 1 - 1 1/2 tsp. peppermint extract 
  • 4 raw egg yolks - optional   The yolks make the ice cream richer and healthier. Get the freshest and healthiest eggs possible. The local farmer's market can be a great source for delicious and healthy eggs, they are much better than the ones at the grocery store. 

Getting Started

1. Pour your milk, cream, honey, peppermint leaves, 1 tsp. of peppermint extract and egg yolks (optional, but recommended) into a blender and process for about 30 second or until everything is thoroughly mixed and the peppermint leaves are in small bits.

Note: All the ingredients together will likely fill your blender to close to the top, so put a towel over the lid before you turn it on to protect your kitchen counter from a spraying of milk and cream. Yes, I am speaking from experience. :-D I could have made the recipe with a little less liquid, but I like the proportion of ingredients so much that I didn't want to mess with them, plus this makes about 1/2 gallon of ice cream. A perfect amount in my book.


2. Try a sample of the milk/cream mixture to decide if you want the extra 1/2 tsp. of peppermint extract. If you think it needs it, add the extract and mix for 15 seconds more. 

3. Pour mixture into your ice cream maker and then dump in your chopped chocolate. Follow manufacturers instruction for freezing ice cream.

4. Garnish with fresh peppermint leaves and enjoy every scrumptious bite. I know I will!


    Thursday, May 6, 2010

    Rhubarb Pie

    Hurray! Home-grown spring fruits and vegetables are beginning to make their appearance! My mother-in-law recently brought me a very decent amount of rhubarb and asparagus from her garden, so I thought this would be the perfect time to share a rhubarb pie recipe. We are and have been enjoying a lot of rhubarb desserts. The question is do I make a rhubarb cake or rhubarb crisp next?

    I used rapadura to sweeten my pie and it worked great. Next time I might try decreasing the sugar amount and using some stevia in replacement. I should mention this pie isn't overly sweet, more like just sweet enough. Some recipes I've seen use 2 parts rhubarb to 1 part sugar, wow, that would be much too sugary for my taste buds as I prefer to taste the fruit. The vanilla ice cream or whip cream you serve with it (which I say is a must) adds all the extra sweetness you'll need, if you need it at all.

    When picking rhubarb try to get stalks that aren't any thicker then your thumb. The thicker they are the more bitter and stringy they are. Young, fresh rhubarb works the best.

    What You'll Need - one 9" covered pie

    Whole Wheat Pie Crust
    3 cups organic whole wheat or spelt flour
    1 tsp. sea salt
    2 tbsp. rapadura - optional, but works well with this pie
    1 cup cold, organic butter
    12 tbsp. cold, organic milk

    Filling
    6 cups rhubarb, washed and cut into 1/2" pieces
    1 1/2 cup rapadura or white sugar
    1/4 cup + 1 Tbsp cornstarch (I did try arrowroot the first time I made this pie and didn't have much success. I'm going to try it one more time with a couple of changes. I'll update the recipe it it works.)
    1/4 tsp. sea salt
    2 tbsp. cold butter

    Other Items
    2 large mixing bowls
    Pastry Blender or two knifes
    Fork
    Mixing spoon
    Measuring cups and spoons
    Rolling Pin
    9" pie pan
    Rimmed cookie sheet lined with tinfoil


    Getting Started

    Preheat oven to 425 degrees.

    1. Follow the instructions for making the whole wheat pie crust from my previous post:
    http://artistta.blogspot.com/2010/05/whole-wheat-or-spelt-pie-crust.html

    2. In a large mixing bowl, stir together your rhubarb, sugar, cornstarch and salt.

    3. Roll out your bottom pie crust so that it's at least 2" larger than your pie pan when the pan is upside down. See the picture below.


    4. Place the rolled out dough into your pie pan and fill with your pie ingredients, then chop your 2 tbsp. of butter and place on top.


    5. Roll out your top crust so it's about 1" larger than the top of the pie. You can either place it directly on the pie and cut several 2"-3" slits in the top to allow steam to release or you can cut it into strips to do a lattice top. As you'll be able to see from the following pictures I decided to do a lattice top.

    Trim your edges of excess dough, then crimp them with your fingers or the tines of a fork.


    6. Optional Step: Brush the top of your pie with milk, cream or an egg yolk mix with 1/8 tsp. of water then sprinkle a little sugar on top.

    7. Place your pie on your cookie sheet that has been lined with tinfoil. This is in case the juices from the pie overflow. You don't want them to get on the bottom of your oven and start to smoke, unless you like that natural smoke flavor in your pie! :-) I've made that mistake before and it's so frustrating, because once the juice starts smoking there's nothing you can really do about it, except clean your oven really well before you use it next time.

    I'd also recommend covering the edges of your pie with tinfoil so they don't burn. They will bake much faster then the rest of the pie.

    8. Put your pie in a pre-heated 425 degree oven and bake for 30 minutes. Then turn your oven down to 350 degrees. and bake the pie for an additional 30-35 minutes. If you covered the edges of your pie with tinfoil, remove it when you turn the temperature down.

    Allow the pie to cool completely before serving and make sure there is a large scoop of vanilla ice cream or whip cream to go with it!