

If you are completely new to the idea of fermenting veggies there is plenty of wonderful health reason for why you should consider incorporating this wonderful health food into your diet. Fermenting was done in the past to keep food fresh for long periods of time, because of course there were no grocery stores to run to or refrigerates to raid when you needed something to eat and gardens certainly didn't produce year round. During the fermenting process, which includes your vegetables, water, salt, whey and spices/herbs (if you want any), lactic acid bacteria is produced. Lactic acid keeps the vegetables from rotting (at least for a time) and also provides some wonderful benefits for your intestinal track by increasing beneficial bacteria and encouraging the growth of healthy flora. Fermented vegetables are filled with fiber, nutrients and wonderful digestive helping enzymes.
"Lacto-fermented condiments are easy to make. Fruits and vegetables are first washed and cut up, mixed with salt and herbs or spices and then pounds briefly to release juices. They are then pressed into an air tight container. Salt inhibits the putrefying bacteria for several days until enough lactic acid is produced to preserve the vegetables for many months. The amount of salt can be reduced or even eliminated if whey is added to the pickling solution. Rich in lactic acid and lactic-acid-producing bacteria, whey acts as an inoculant, reducing the time needed for sufficient lactic acid to produce to ensure preservation. Use of whey will result in consistently successful pickling; it is essential for pickling fruits. During the first few days of fermentation, the vegetables are kept at room temperature; afterwards, they must be placed in a cool, dark place for long-term preservation."
~Nourishing Traditions by Sally Fallon, page 90
 I remember my first experience with homemade sauerkraut. It was probably 4-5 years ago and my mom was on a kick with this cookbook called Nourishing Traditions by Sally Fallon. This woman had a whole new approach to cooking and baking and I thought she might be nuts! :-) Her recipes seemed so foreign. I couldn't imagine people cooking the way she described. (How things have changed, since I love Nourishing Traditions now and if you follow my blog you'll know I quote from it rather regularly.) My mom made some homemade sauerkraut for my brother and me to try. Her container was bubbling and your could hear the carbon dioxide escaping, which naturally occurs in the fermenting process. I was very, very hesitant to try the sauerkraut. I was worried I was going to get sick. I mean normally sauerkraut comes in a can or jar in the canned food section at the grocery store. Certainly there was something special food companies where doing to make this food safe to eat. It took me months, if not longer, to become really comfortable with this new way of preparing or preserving food. My first couple of batches of sauerkraut I threw away because mold would form on top or it turned colors on the top. I was still worried I wasn't doing something right and would get sick, so into the trash the sauerkraut went. However, I was still very curious about eating food like this and it hit home for my desire to prepare foods in a more natural way, aka no preservative or processed ingredients.
Once you get past the initial wariness of naturally fermenting your food, it's easy to relax and start a variety of experimenting. Homemade yogurt, kefir, sourdough, etc. is all fermented food and just like fermented vegetables, are excellent for maintaining a healthy body. Get creative with with what type of vegetables you ferment, how you slice them, how long you let them ferment and try adding different spices.
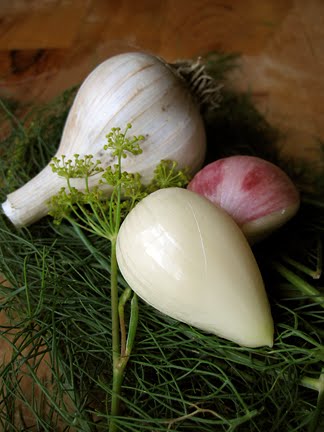
For the fermenting I tried this time, I kept things simple. I decided to slice my veggies into spears because I thought I would have a greater tendency to eat them. They would be much easier to grab and munch on when I wanted a quick snack. I also only added garlic or garlic and dill for extra flavor.
After two days of fermenting I taste tested the veggies and decided to let them go for another day. How you slice your vegetables and the temperature in your house can easily change your fermenting time from approximately 2 days to 4-6 days. The warmer the house is the less time it takes for food to ferment. The average fermenting time is 3 days and works well when you're first starting out.
One things to note, the sauerkraut that you buy at the store in a can IS NOT the same as making the lacto-fermented stuff at home. The canning process kills any healthy bacteria that may have existed, assuming it was processed in a healthy way in the first place. Plus who knows what type of preservatives they've added to the can. Also, a site you might like on fermenting food is Wild Fermentation, and check out this article by Michael O’Brien on Fermented Vegetables.
The "recipe" you'll see below is for some very simple lacto-fermenting. In future posts I'll go into more examples of spices and herbs you can add. I also just made a fermented salsa and I'll share that recipe in the next day or two.
 What You'll Need: for 4 pints of sliced vegetables
• The vegetable(s) of your choice,
sliced and enough to fill 4 mason
jars. I did zucchini, carrots,
cucumbers and green beans.
• 4 cups filtered water
• 8 tsp. salt
• 4 tbsp. whey
• 8 cloves of garlic, smashed
• Fresh sprigs of dill
• 4 mason jars with lids
Getting Started:
1. Fill each jar with vegetables, 1-2 cloves of smashed garlic and 1-2 sprigs of dill. (I actually only added dill to the zucchini and cucumber jars.) Have them sliced short
enough that you have about 1" of space below the rim of the jar. Pack them good or they'll float when you pour your liquid on them.
2. Mix together your water, salt and whey in a small bowl or pitcher until salt has fully dissolved. Then fill each jar, just until your vegetables are covered. Alternatively, you could fill the jars with water until veggies are covered and then add 2 tsp. of salt ad 1 tbsp. of whey.
3. Cover jars tightly and then place on counter (preferably in a room around 70º) out of direct sunlight for 3 days.
4. Place lacto-fermented vegetables into fridge for long term storage or in a root cellar, if you had one!
Enjoy this great food, but don't overdo it. These are better if treated like a condiment.


This was such an informative post! I too enjoy fermented cabbage, but I have never tried to make any type of fermented veggies at home. You have certainly inspired me and given me the tools I need for success. Thank you!
ReplyDeleteAwesome! Hadn't thought of doing my veges as snacky spears so thanks :)
ReplyDeleteI love this idea - I just need to come up with a way to get enough whey!
ReplyDeleteHi Christy, do you make your own yogurt? I skim the whey off of my homemade yogurt for recipes like this. You can also ferment without whey, but you need to increase the salt. I'd probably double the salt amount. You could also try making some cheese, here's a pretty simple recipe I use http://artistta.blogspot.com/2010/05/homemade-raw-milk-farmer-cheese.html
ReplyDeleteI love Sally Fallon and absolutely love fermented anything. Beautiful post!
ReplyDeleteThanks Megan! Sally Fallon is great :-)
ReplyDeleteHi Christy. I tried doing this the other day and after about 2 days the lids of the mason jars were all dented and there was liquid on the counter. The pickles smelled horrible so I threw them away. What went wrong? I want to try this again.
ReplyDeleteHi, I'm trying to think what may have gone wrong. I'm not sure why the lids would have been dented. One thing that can happen is that the carbon dioxide can build up inside the container and actually cause the jar to break, perhaps it caused the lids to dent? I wonder if it built up too much in your jars? To avoid that you can vent the jars one or twice a day (simply unscrew lids and allow carbon dioxide to escape then put lids back on). The liquid coming out of the jars is very normal. I often place my ferments on a towel to soak up any leaking liquid. As for the odor. Make sure to be using a whey from making a fermented item, like kefir or yogurt. If you don't have whey, then it's essential that the salt increases. The salt or whey in ferments is what keeps the food fermenting and not rotting. If your environment is very warm, this could also speed of the fermenting process immensely. Fermenting is definitely a bit of learning as you go, since a variety of factors like temperature and how the vegetables are sliced can affect the length of time needed to ferment. Also, be sure the vegetables are staying below the liquid. Anything above the liquid will rot. If you get a bit of white on top of the liquid, skim it off before eating, but otherwise the ferment is still safe. If you get full out mold, I would toss and start again. I have certainly had many failures and don't always know what causes them. It always disappointing when it happens. I primarily still only ferment cabbage. The more I have done it, the greater success I have had and I know make several gallons worth at a time.
DeleteIf you try again and still have problems, please let me know and I'll see if I can't help find another solution. Good luck!