Showing posts with label Grain Free. Show all posts

Tuesday, March 13, 2012

Coconut flour yellow cake - great for birthday cakes! Gluten and grain free.

My husband's birthday was several weeks ago and one dessert item he's had a hankering for is good old fashion yellow birthday cake. The only problem is our son can't have wheat, so that nixes the majority of recipes out there. I know that I could have used a gluten-free flour to make a close substitute, but to be honest I'm not a huge fan of the GF flours on the market. They are often filled with ingredients that I'd prefer to avoid in our diet. So, instead I made a very delicious version using coconut flour.

I've messed with this recipe over the last year on and off again, playing around with different ingredients. This time because I wanted to provide something more similar to a traditional birthday cake I went with more traditional ingredients, like organic white sugar instead of honey and butter instead of coconut oil. I have shared a coconut flour chocolate cake recipe we use all the time. You can get away with a different variety of ingredients with chocolate cake, because the chocolate masks some of the flavors, but with a white cake a flavor like honey or coconut oil will be much more pronounced.


Tuesday, April 12, 2011

Sweet Potato Roulade - perfect for brunch or as a special treat with dinner (grain free)


Once in awhile you need something special and elegant to accompany your dinner and a roulade is an easy way to accomplish this. They aren't overly difficult to make, yet looked nice and taste great. They can easily be made ahead of time and can also travel well.

This roulade recipe comes from the cookbook The Best-Ever Vegetarian Cookbook by Nicola Graimes. It's slightly sweet from the sweet potato and the allspice berries add a wonderful extra flavor. We enjoyed this so much with dinner last night we practically ate the whole thing. Even my 12 month old daughter and 3 year old son each had two slices.

Friday, February 11, 2011

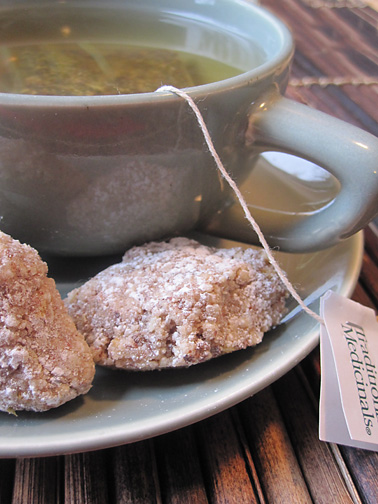
Ricciarelli or Almond Macaroons - Grain Free


I don't know about you, but I have numerous cookbooks where I tried several recipes from them and either wasn't impressed or completed disappointed. This summer I decided to do away with those less than satisfactory cookbooks and into the trash they went. Now I have my favorites left and at the top of that list is my cookbooks from Nigella Lawson. I've made dozens of her recipes and have had great success with almost all of them. There has been one or two recipes along the way that I didn't love quite as much as others, but that was more personal preference than it was the fault of a poor written or simply bad recipe.  I know I can pick up one of her cookbooks find a recipe that sounds/looks good and it will turn out, which equals a good cookbook to me. Well, these little superb Ricciarelli or Almond Macaroons from Nigella's How To Be a Domestic Goddess, didn't let me down!

Monday, February 7, 2011

Chocolate Coconut Flour Cake Sweetened w/ Honey

I was in a bit of a whimsical mood on this cake making day and Valentines day was on my mind. Out came the heart shaped cookie cutter and I had fun making some bite size pieces of cake.

This is one of those cakes I've been trying to master for a while. Frankly, I've been trying to figure out the best ways to use coconut flour in general. There has been a whole lot of trial and error and a whole lot more failure than successes, but that's how it goes sometimes. I happen to like challenges and I've been determined to come up with a chocolate coconut flour cake that can hold it's own next to one of those typical white flour cakes. Method is key to making this cake as it will make a drastic difference in how light the cake will turn out.


If you've never used coconut flour, I'd highly recommend trying it out. I purchase mine,  from Tropical Traditions. Actually I'm not sure who else even sells it.

When I originally started making this cake I was working with enough ingredients for only one layer. However, in this last attempt I split the batter in half between two pans and was very pleased with how it turned out. I haven't tried to put all the batter in one pan as of yet. It would likely work fine, I just question whether the cake might loose some of it's volume. The cake layers are not overly tall, so if you want a more typical cake with some height I'd recommend doubling this recipe and making 4 layers.

This is a dark and rich cake, but not overly sweet (that tends to be my style for baked goods), if you really prefer a sweet cake you could increase the honey by an additional 1/4 cup. For an icing, forgo the classic butter and powdered sugar frosting for a deliciously thick, homemade vanilla whip cream. It's the perfect companion.  For the pictures in this post, I baked the cake in two 8"x8" square pans. An 8" round would work too, but if you do a 9" round you'll probably want to check the cake after it has baked for about 20 minutes.

Thursday, January 20, 2011

Coconut Flour Pancakes


 I told myself I would share more coconut flour recipes this coming year. One reason is because so many people are suffering from gluten issues (coconut flour is gluten and grain free) and I also feel that it's good to have diversity in the diet, so not always relying on wheat or wheat related grains for all baking purposes. There's also the fact that I have a ton of coconut flour on hand and want to find some excellent uses for it.  My family has some gluten sensitivities. We are blessed that they aren't extreme, but I do like finding ways to cut down our gluten intake whenever I can. 

For my first coconut flour recipe, I'm actually sharing a recipe from one of my favorite blogs Nourishing Days. If you aren't familiar with Shannon's site, please check it out. You'll love everything she has to share, from wonderful recipes (which are often gluten free friendly) and fabulous nutrition info., to great giveaways.

By the way, have no hesitancy about trying these pancakes, thinking there's no way they could be as good as those fluffy white flour ones. You would be missing out. These coconut flour pancakes are wonderful. They're nice and fluffy, just like regular ones, plus they have a higher protein content, so they tend to stick to the ribs a bit more. 

What You'll Need
serves ~4
4 eggs, room temperature
1 cup milk - cows milk or coconut milk
2 teaspoons pure vanilla extract
1 tablespoon honey or a pinch of stevia
1/2 cup coconut flour
1 teaspoon baking soda
1/2 teaspoon unrefined sea salt
coconut oil or butter for frying


How You'll Do It
1. Beat your eggs for about two minutes, until they are light and frothy. Then mix in milk, vanilla and honey or stevia. 

2. In a second bowl combine coconut flour, baking soda and salt. Add dry ingredients to wet and mix until thoroughly incorporated. Don't be surprised by the thinness of the batter at first. The coconut flour will thicken tremendously within a minute or two. 

3. Melt coconut oil or butter in skillet over medium-low heat. Use a couple tablespoon of batter for each pancake. Pancakes should be no larger than 2"-3" in diameter. Cook on first side until the top begins to firm and the bottom has browned and then flip. I think these pancakes cook a little slower than regular ones, so don't rush them.


Serve hot with butter and pure maple syrup! 
Enjoy!


Thursday, August 12, 2010

Coconut Flour Pizza Crust


With my last post I mentioned that I tried two new gluten and grain free pizza recipes. Here's number two. This one takes advantage of coconut flour. Are you familiar with this great flour? It's much higher in fiber than traditional flour with gluten and it "contains over 19% non-gluten protein." If you have grain issues this may be a great alternative flour for you. I use Tropical Traditions coconut flour. I also usually buy my organic coconut oil from them too. Their Gold Label Virgin Coconut Oil has wonderful flavor and is excellent for cooking and baking with.

This gluten free pizza crust cooks up very similarly to a regular wheat/white flour crust, which is surprising when you look at the list of ingredients and see only 2 tbsp. of flour in it. The main difference in my opinion is it doesn't get quite as crispy as a traditional pizza crust and it will absorb some of  the pizza sauce you put on it.  It reheats very well or in our house we've been eating leftovers cold because of it being so hot out. Either way it tastes great! This recipe is from Tropical Traditions, they also have a video demonstration of how to make it, you can check it out here: http://www.freecoconutrecipes.com/recipe_Gluten-Free_Pizza_Crust.htm


What You'll Need: for 1 small to medium pizza, serves 2-3
For the crust
  • 2 cups organic, whole milk mozzarella cheese, shredded
  • 2 large organic eggs
  • 2 tablespoons flax meal
  • 2 tablespoons coconut flour
  • ½ teaspoon baking powder 
For the pizza sauce  - This is the same sauce I used for the recipe I posted Tuesday.
  • 15 oz. can of crushed tomatoes
  • 1 small onion diced
  • Olive oil
  • Oregano - around a 1/4 - 1/2 tsp. 
  • 3 cloves garlic smashed and chopped
  • 1+ tbsp. sugar - optional
  • Sea salt
For the topping 
  • 3/4 - 1lb shredded, whole milk mozzarella
  • ~1lb sweet Italian sausage
  • Dried oregano to sprinkle on top of the pizza
Getting Started:
For the crust
1.  First preheat your oven to 350º, then put all of your crust ingredients into a medium size bowl and mix until you have a sticky dough. It works well to start by mixing with a spoon and then your hands. A small note, I didn't have flax meal on hand when I made this recipe, so instead I used an extra 2 tbsp. of coconut flour and it worked great.


2. Spread or roll the dough out on a parchment lined cookie sheet to about 1/4" thick. 


3. Bake in your preheated 350º oven for 15 minutes, then pull the crust from the oven and flip it to it's other side. You can either use a spatula to do this or pick-up the parchment paper and flip the crust onto another piece of parchment.

4. Put crust back into the oven and bake for another 15 minutes. 

5. Pull the crust from the oven and allow to cool before putting your toppings on it. This only takes about 15 min. or so. 


For the Sauce:
1. To make your pizza sauce, first cook your onion until softened in a little bit of olive oil in a medium pot.

2. Add your crushed tomatoes, chopped garlic, oregano (start with 1/4 tsp. and add more later if it needs it, sorry I never measure and just go my taste) and a pinch of sea salt. Simmer for 15+ minutes, occasionally stirring.

3. Blend your sauce with a submersion blender until smooth, then do a taste test. Add more oregano, salt and/or a bit of sugar if it needs it.  I use sugar if my tomatoes don't have any sweetness. I think it adds a nice bit of extra flavor to a pizza sauce, but by no means do you need it. After adding extra seasoning, allow to simmer for an additional 5 - 10 minutes, then set aside

For the toppings
1.  Slice, or form into small chunks, your Italian sausage and cook it in a medium size pan. The pizza will only be placed under a broiler for a couple of minutes once assembled and not baked, so cook your sausage a step further then just simply browning it. Once it's done, drain any extra fat off of it by placing the sausage on some paper towel.

2. Spread your pizza sauce on your crust and then top with your toppings. I always like to sprinkle a little dried oregano on the pizza once it's assembled, makes the pizza just that much more tasty! 


3. Place pizza (on a cookie sheet of course) under your oven's broiler until cheese has melted. This won't take long so don't get distracted and forget it's in there. I"m terrible about forgetting things under the broiler, it's one of those mistakes that happens when I try to multitask in the kitchen! :-)


Serve the pizza immediately. Enjoy!!!